
Originally published in November 2014
Here at BitcoinsInIreland, we have been playing with our mining rig over the past week . We’ve been generating coins on several pools for the last week, ahead of us expanding our effort to review all of the public bitcoin mining pools. Unlike many of you, the purpose of our hashing is to generate information for the reviews and also as an alternative considering how much GPU mining damaged our laptop – not running full pelt, 24/7 trying to generate profitable bitcoins. I wanted to see if there was a way to get a bit more functionality than the stock Antminer S1 gives you. I was aware load balancing to allow you to split the mining power between different pools, but as there are a lot of pools out there these days, having only three pools in the web interface for the miner seemed a bit annoying, as I’d have to copy and paste, a lot.
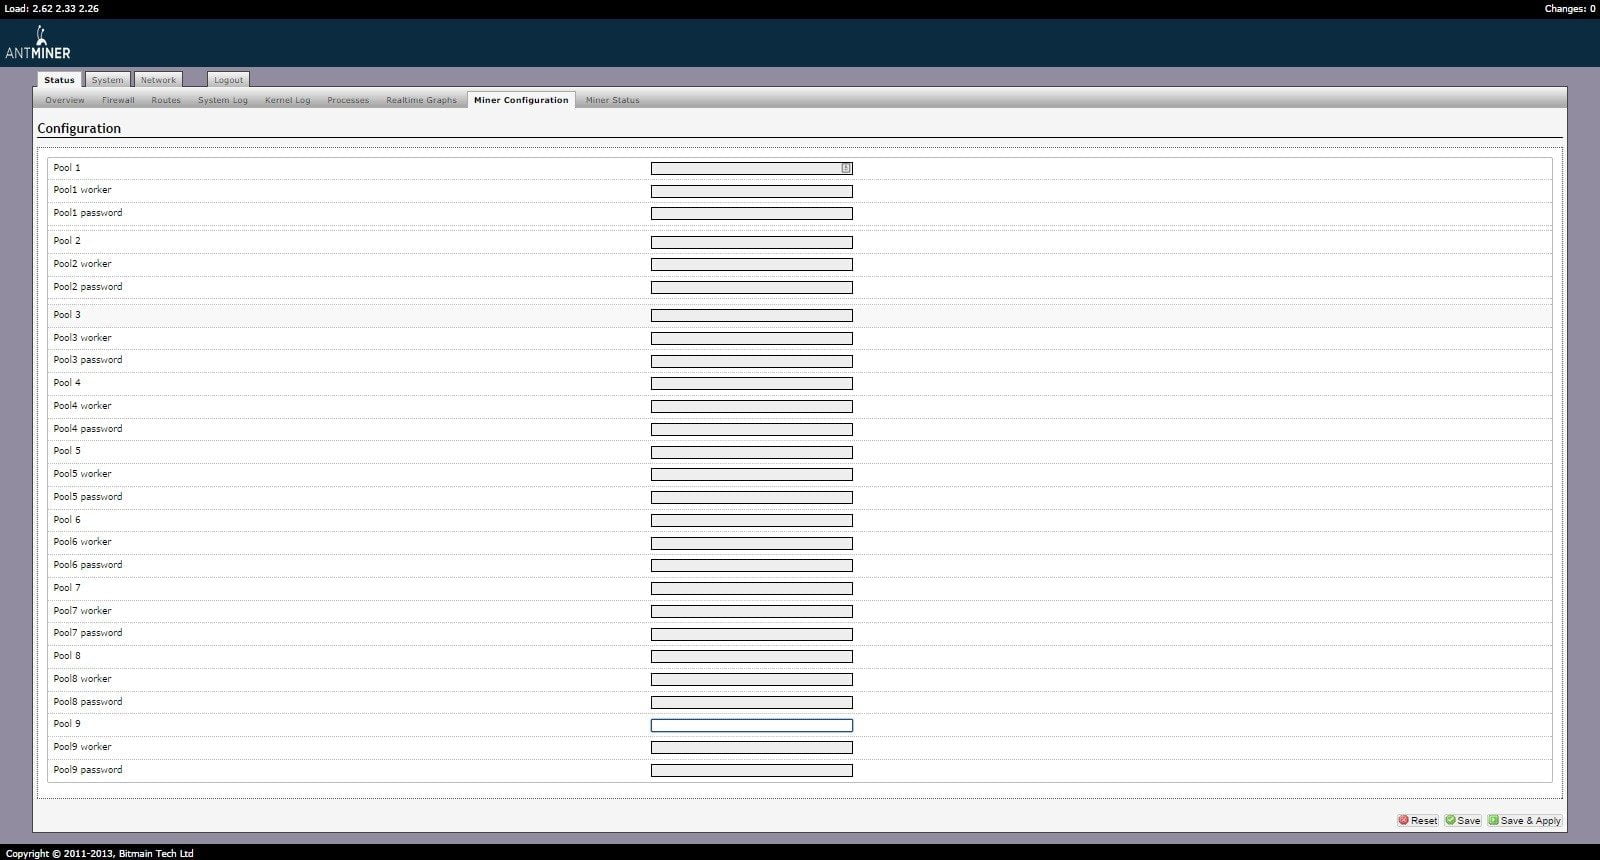
So I did a little research and came across this post where someone had gotten five pools configured, and I set myself the challenge to see if I could get the Antminer S1 to display 9 sets of pool information, and then see if the hardware would concurrently mine 9 pools. I’m aware this is splitting 180ghs into lots of small chunks, but it was more for the craic to see if it could be done. And a major benefit is that I can have lots of pools saved, so I can just change the balancing as and when I choose. So in this step-by-step guide, I thought I’d look at how you can add as many extra mining pools as you want to the Antminer S1 miner configuration screen.
Before we start, you need to go into System | Backup / Flash Firmware, and create a backup of your firmware configuration. When I did this the first time, I broke the miner configuration page, and was able to roll back the edits and get it working again by restoring this backup. You do not need to overclock your device for this, but if you want to concurrently mine several pools, you do need to enable load balancing, which is outlined here.
You will also need a SSH client such as PuTTY, and also it’s probably handy to have a look through the vi editor commands cheatsheet. The main things are commands can be pasted by right clicking in putty, and for the vi editor, lowercase “i” enables editing mode, “esc” will bring you back to the command line, “:q!” will let you quit without making changes, and “:wq” will save and quit once finished editing.
A step-by-step guide to adding extra pools to the Antminer S1 Miner Configuration Screen
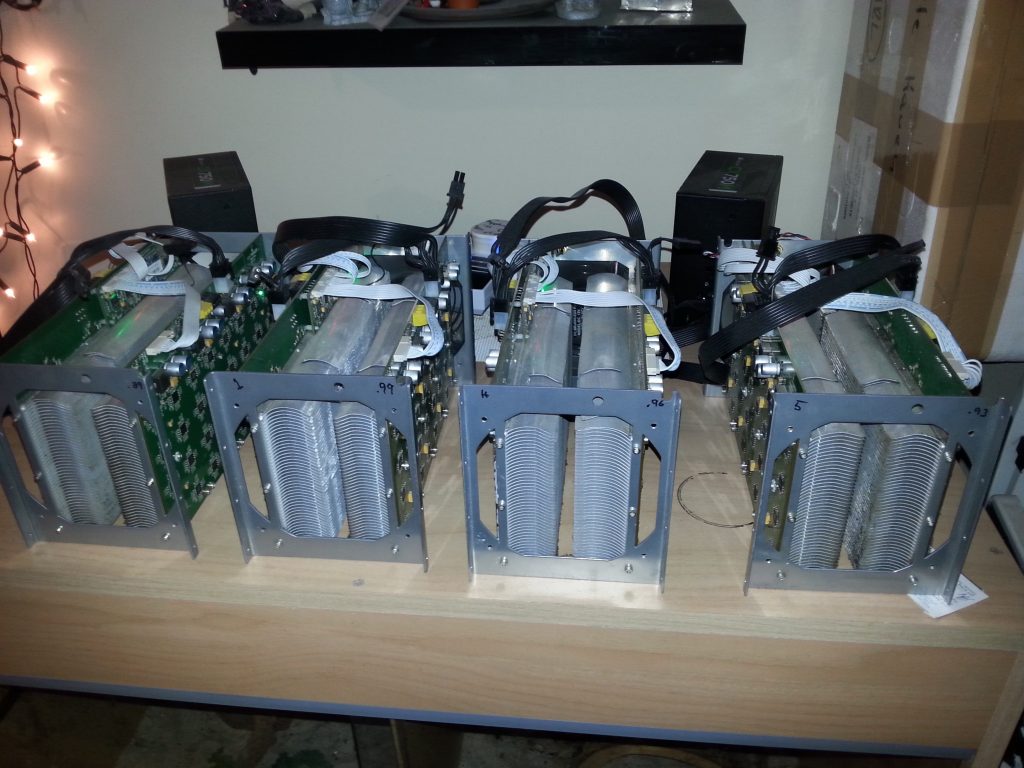
This is your stock 3 pool Miner Configuration Screen
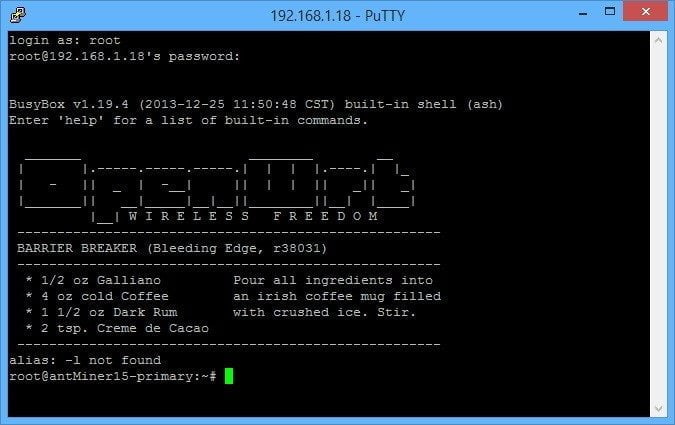
Step 1: Open putty, put in the IP address of your antminer and connect. If it’s the first time you are connecting to it, it’ll prompt you about the SSL certificate, and click yes. Enter your username and password (root for both by default) to log in.
Step 2: We need to open one of the cgminer configuration files, so you need to enter the command
vi /etc/init.d/cgminer
Step 3: Press i to enter into edit mode, and use the direction keys to move around the screen
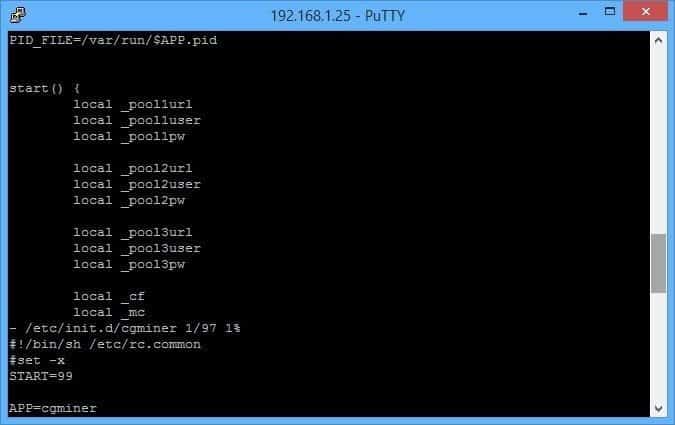
Move to the end of the line local_pool3pw and press enter twice to put in two lines between it and local_cf
Paste in the following by right clicking, removing those which aren’t necessary for you.
local_pool4url
local_pool4user
local_pool4pwlocal_pool5url
local_pool5user
local_pool5pwlocal_pool6url
local_pool6user
local_pool6pwlocal_pool7url
local_pool7user
local_pool7pwlocal_pool8url
local_pool8user
local_pool8pwlocal_pool9url
local_pool9user
local_pool9pw
Step 4: Scroll down the screen to the section in the following screenshot
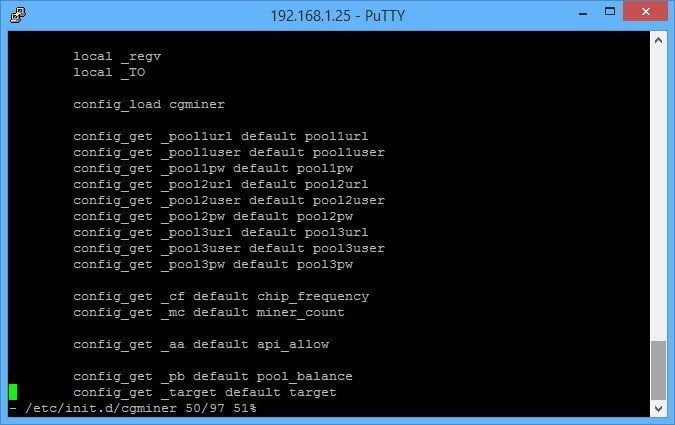
Move to the end of the line config_get _pool3pw default pool3pw and press enter twice, adding some space between it and config_get _cf default chip_frequency
Paste in the following by right clicking, removing those which aren’t necessary for you.
config_get _pool4url default pool4url
config_get _pool4user default pool4user
config_get _pool4pw default pool4pwconfig_get _pool5url default pool5url
config_get _pool5user default pool5user
config_get _pool5pw default pool5pwconfig_get _pool6url default pool6url
config_get _pool6user default pool6user
config_get _pool6pw default pool6pwconfig_get _pool7url default pool7url
config_get _pool7user default pool7user
config_get _pool7pw default pool7pwconfig_get _pool8url default pool8url
config_get _pool8user default pool8user
config_get _pool8pw default pool8pwconfig_get _pool9url default pool9url
config_get _pool9user default pool9user
config_get _pool9pw default pool9pw
Step 5: Scroll further down the screen to the section in the screenshot below
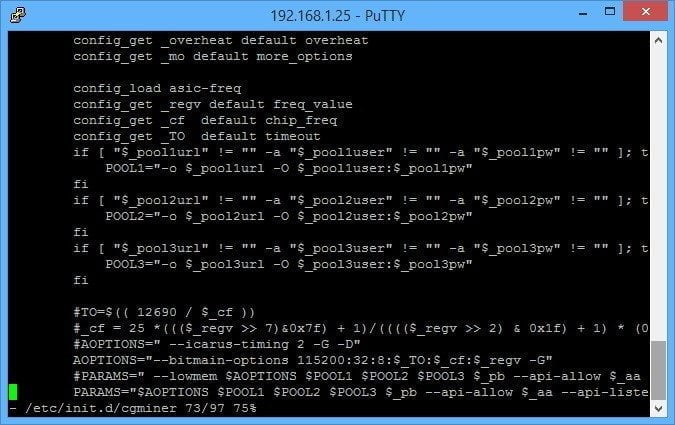
Move to the line saying fi below the pool3 details. Press enter twice to make some lines between it and #TO=$(( 12690 /$_cs ))
Paste in the following by right clicking, removing those which aren’t necessary for you, but I’ll do the full 9 in this.
if [ “$_pool4url” != “” -a “$_pool4user” != “” -a “$_pool4pw” != “” ]; then
POOL4=”-U $_pool4url -O $_pool4user:$_pool4pw”
fi
if [ “$_pool5url” != “” -a “$_pool5user” != “” -a “$_pool5pw” != “” ]; then
POOL5=”-U $_pool5url -O $_pool5user:$_pool5pw”
fiif [ “$_pool6url” != “” -a “$_pool6user” != “” -a “$_pool6pw” != “” ]; then
POOL6=”-U $_pool6url -O $_pool6user:$_pool6pw”
fiif [ “$_pool7url” != “” -a “$_pool7user” != “” -a “$_pool7pw” != “” ]; then
POOL7=”-U $_pool7url -O $_pool7user:$_pool7pw”
fiif [ “$_pool8url” != “” -a “$_pool8user” != “” -a “$_pool8pw” != “” ]; then
POOL8=”-U $_pool8url -O $_pool8user:$_pool8pw”
fiif [ “$_pool9url” != “” -a “$_pool9user” != “” -a “$_pool9pw” != “” ]; then
POOL9=”-U $_pool9url -O $_pool9user:$_pool9pw”
fi
Step 6: The last edit to this file is to the bottom line in the last image above, beginning with PARAMS (but not #PARAMS)
This will look like
PARAMS=”$AOPTIONS $POOL1 $POOL2 $POOL3 $_pb $custom_option –api-listen –api-network”
We need to add the extra pools here, between $POOL3 and $_pb.
With nine pools, it should be updated to
PARAMS=”$AOPTIONS $POOL1 $POOL2 $POOL3 $POOL4 $POOL5 $POOL6 $POOL7 $POOL8 $POOL9 $_pb $custom_option –api-listen –api-network”
Step 7: Hit ESC to exit editing mode, and then type :wq to save and close the file. Cgminer is now updated to store all of the pool credentials.
Step 8: The next step is to edit one more file, which will let you enter pool information in the web interface.
Enter the following command
vi /usr/lib/lua/luci/model/cbi/cgminer/cgminer.lua
This will bring you into the following screen
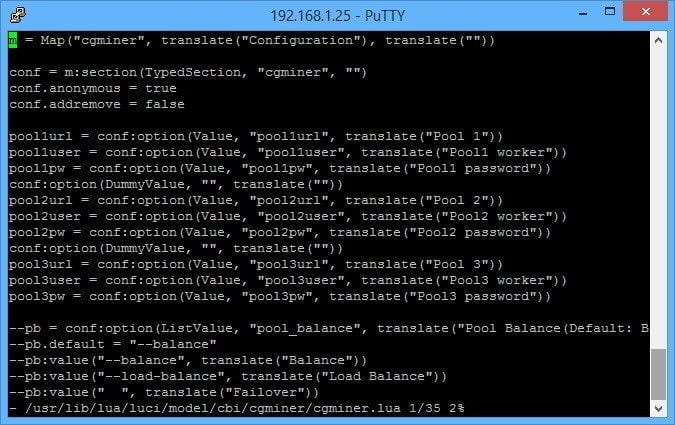
Press i to enter editing mode, and scroll to the end of the line pool3pw = conf:options(Value, “pool3pw, translate(“Pool3 password”)) and press enter twice to put in some lines betwen it and the line beginning –pb = conf:option(ListValue)
Paste in the following information by right clicking and removing any pools you don’t need.
pool4url = conf:option(Value, “pool4url”, translate(“Pool 4”))
pool4user = conf:option(Value, “pool4user”, translate(“Pool4 worker”))
pool4pw = conf:option(Value, “pool4pw”, translate(“Pool4 password”))pool5url = conf:option(Value, “pool5url”, translate(“Pool 5”))
pool5user = conf:option(Value, “pool5user”, translate(“Pool5 worker”))
pool5pw = conf:option(Value, “pool5pw”, translate(“Pool5 password”))pool6url = conf:option(Value, “pool6url”, translate(“Pool 6”))
pool6user = conf:option(Value, “pool6user”, translate(“Pool6 worker”))
pool6pw = conf:option(Value, “pool6pw”, translate(“Pool6 password”))pool7url = conf:option(Value, “pool7url”, translate(“Pool 7”))
pool7user = conf:option(Value, “pool7user”, translate(“Pool7 worker”))
pool7pw = conf:option(Value, “pool7pw”, translate(“Pool7 password”))pool8url = conf:option(Value, “pool8url”, translate(“Pool 8”))
pool8user = conf:option(Value, “pool8user”, translate(“Pool8 worker”))
pool8pw = conf:option(Value, “pool8pw”, translate(“Pool8 password”))pool9url = conf:option(Value, “pool9url”, translate(“Pool 9”))
pool9user = conf:option(Value, “pool9user”, translate(“Pool9 worker”))
pool9pw = conf:option(Value, “pool9pw”, translate(“Pool9 password”))
Step 9: Press ESC to go back to the command prompt, and type :wq to save and quit.
Step 10: Go back to your miner configuration screen, and voila, you should see the screen now letting you input lots of extra pools. Have fun mining!
[xyz-ihs snippet=”BTC-Donation-Text”]